2.- Prototyping
Tank
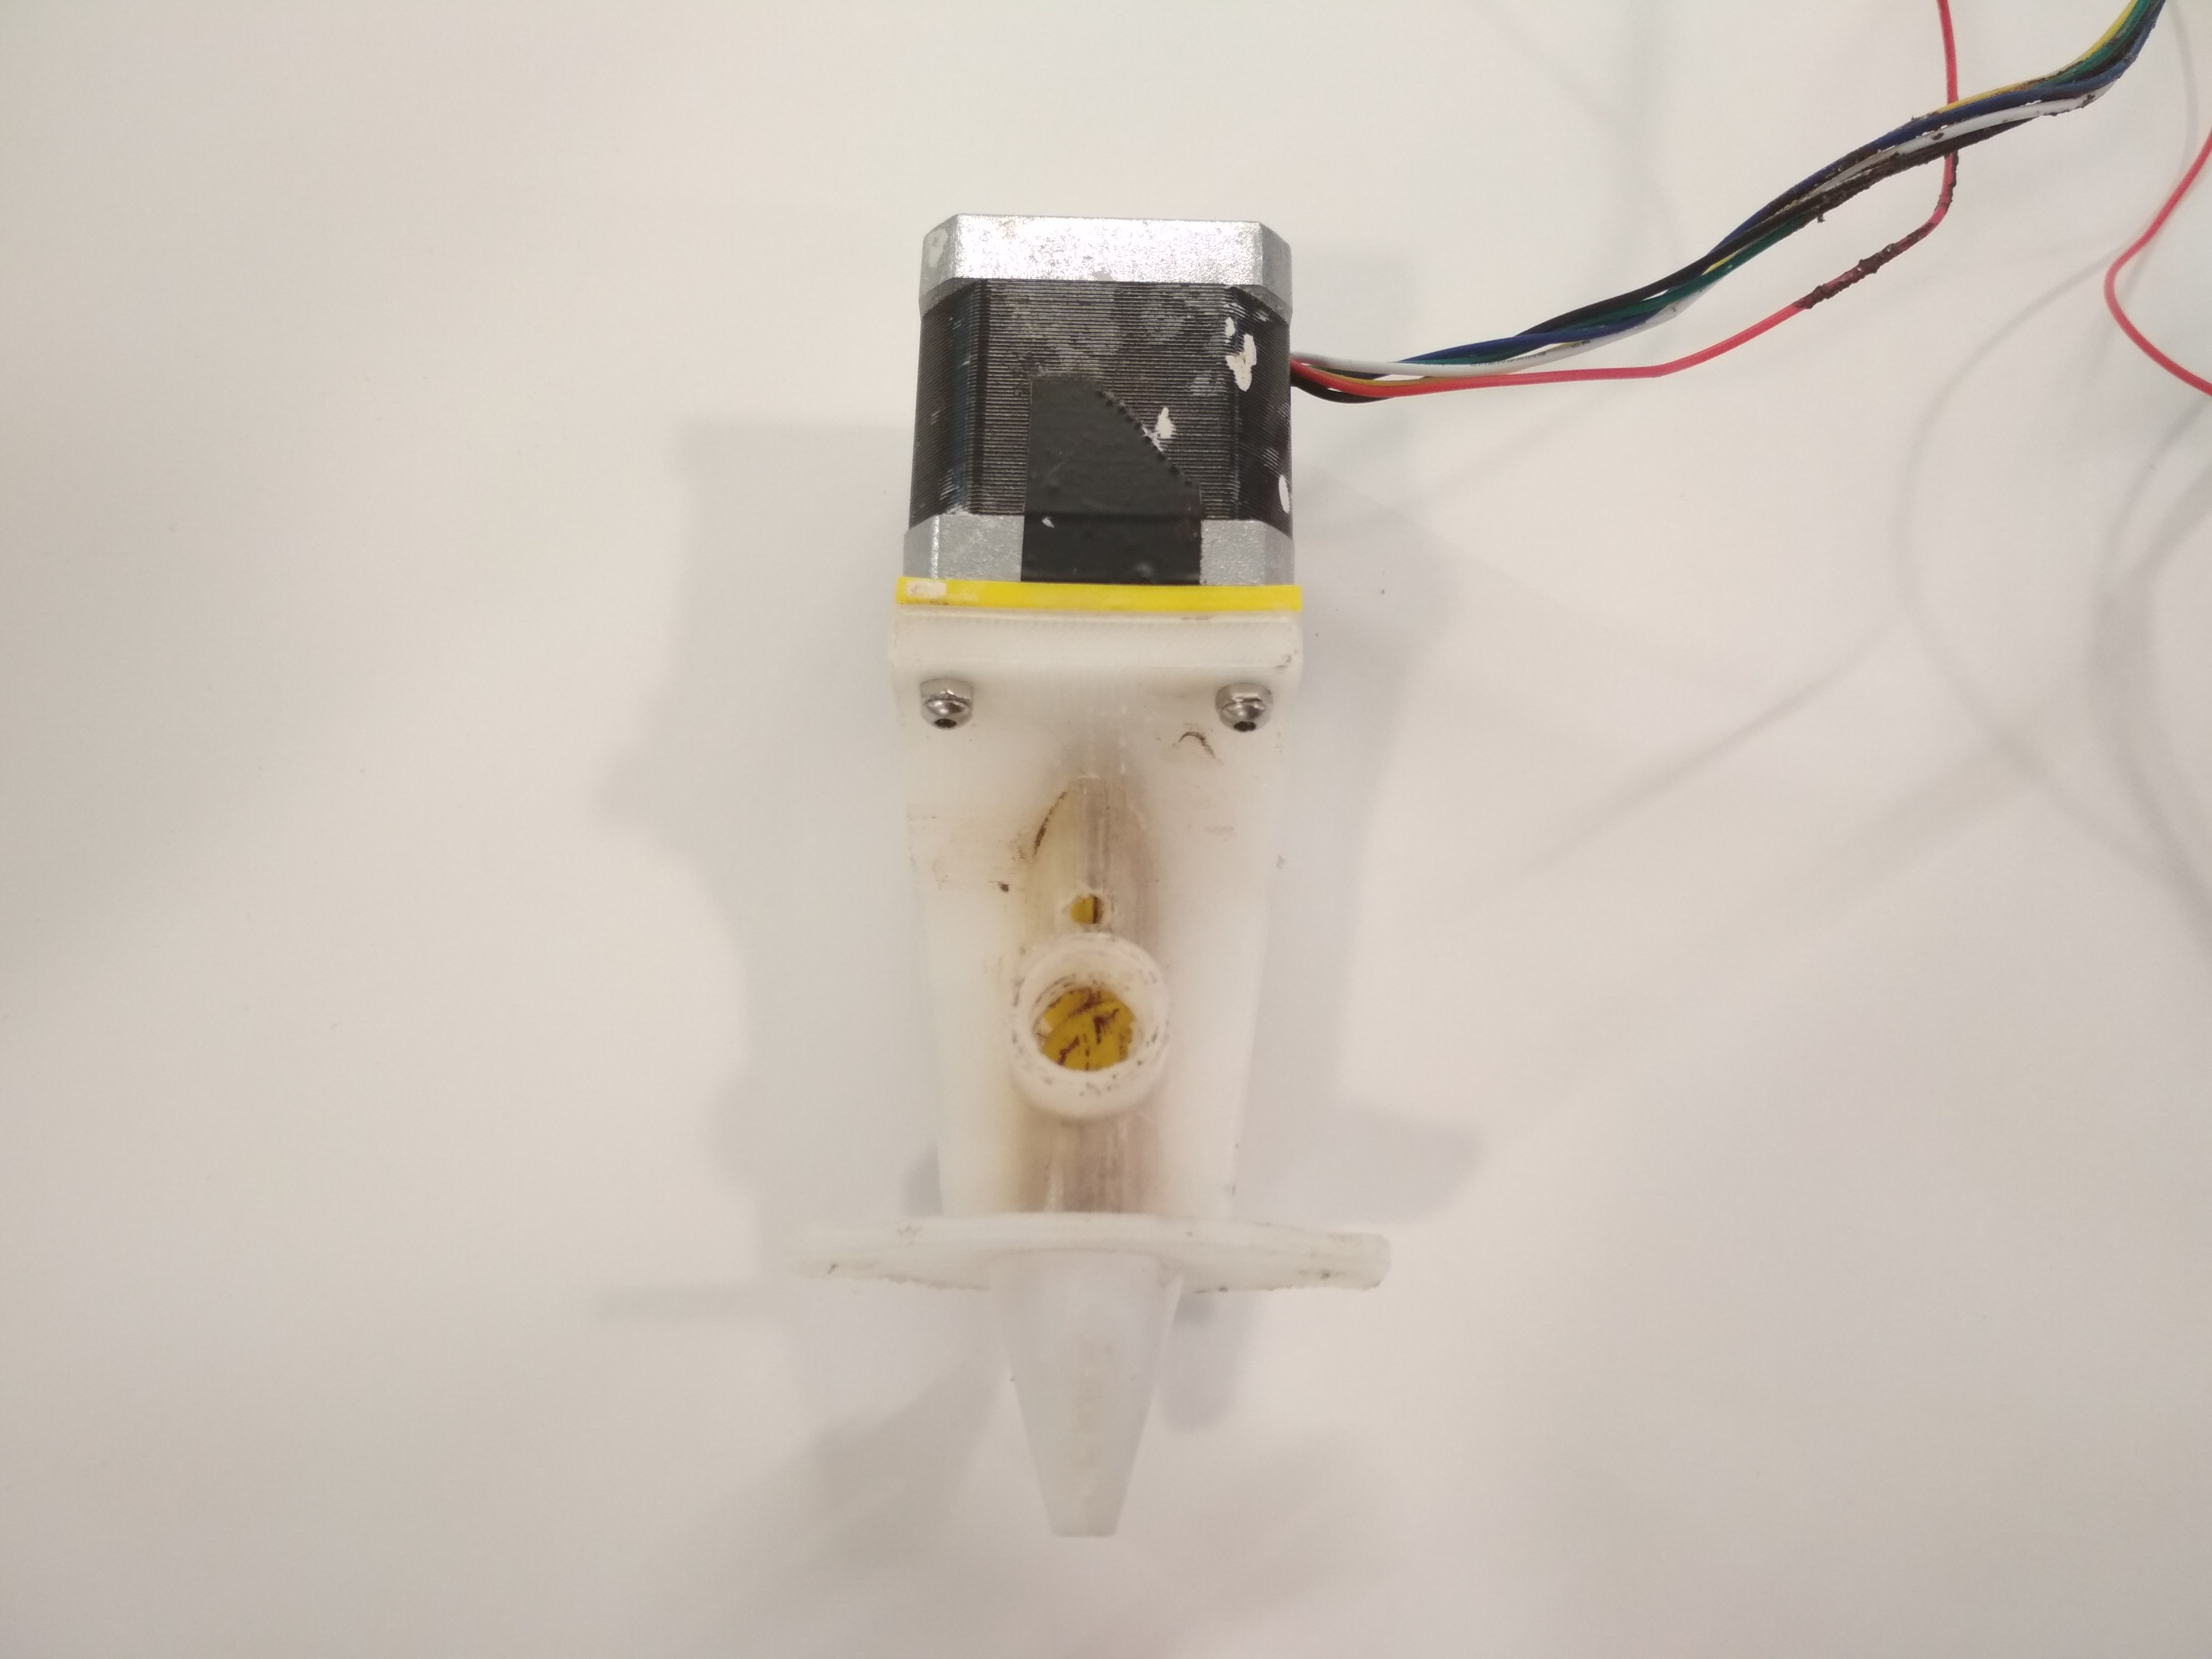
Hero 6
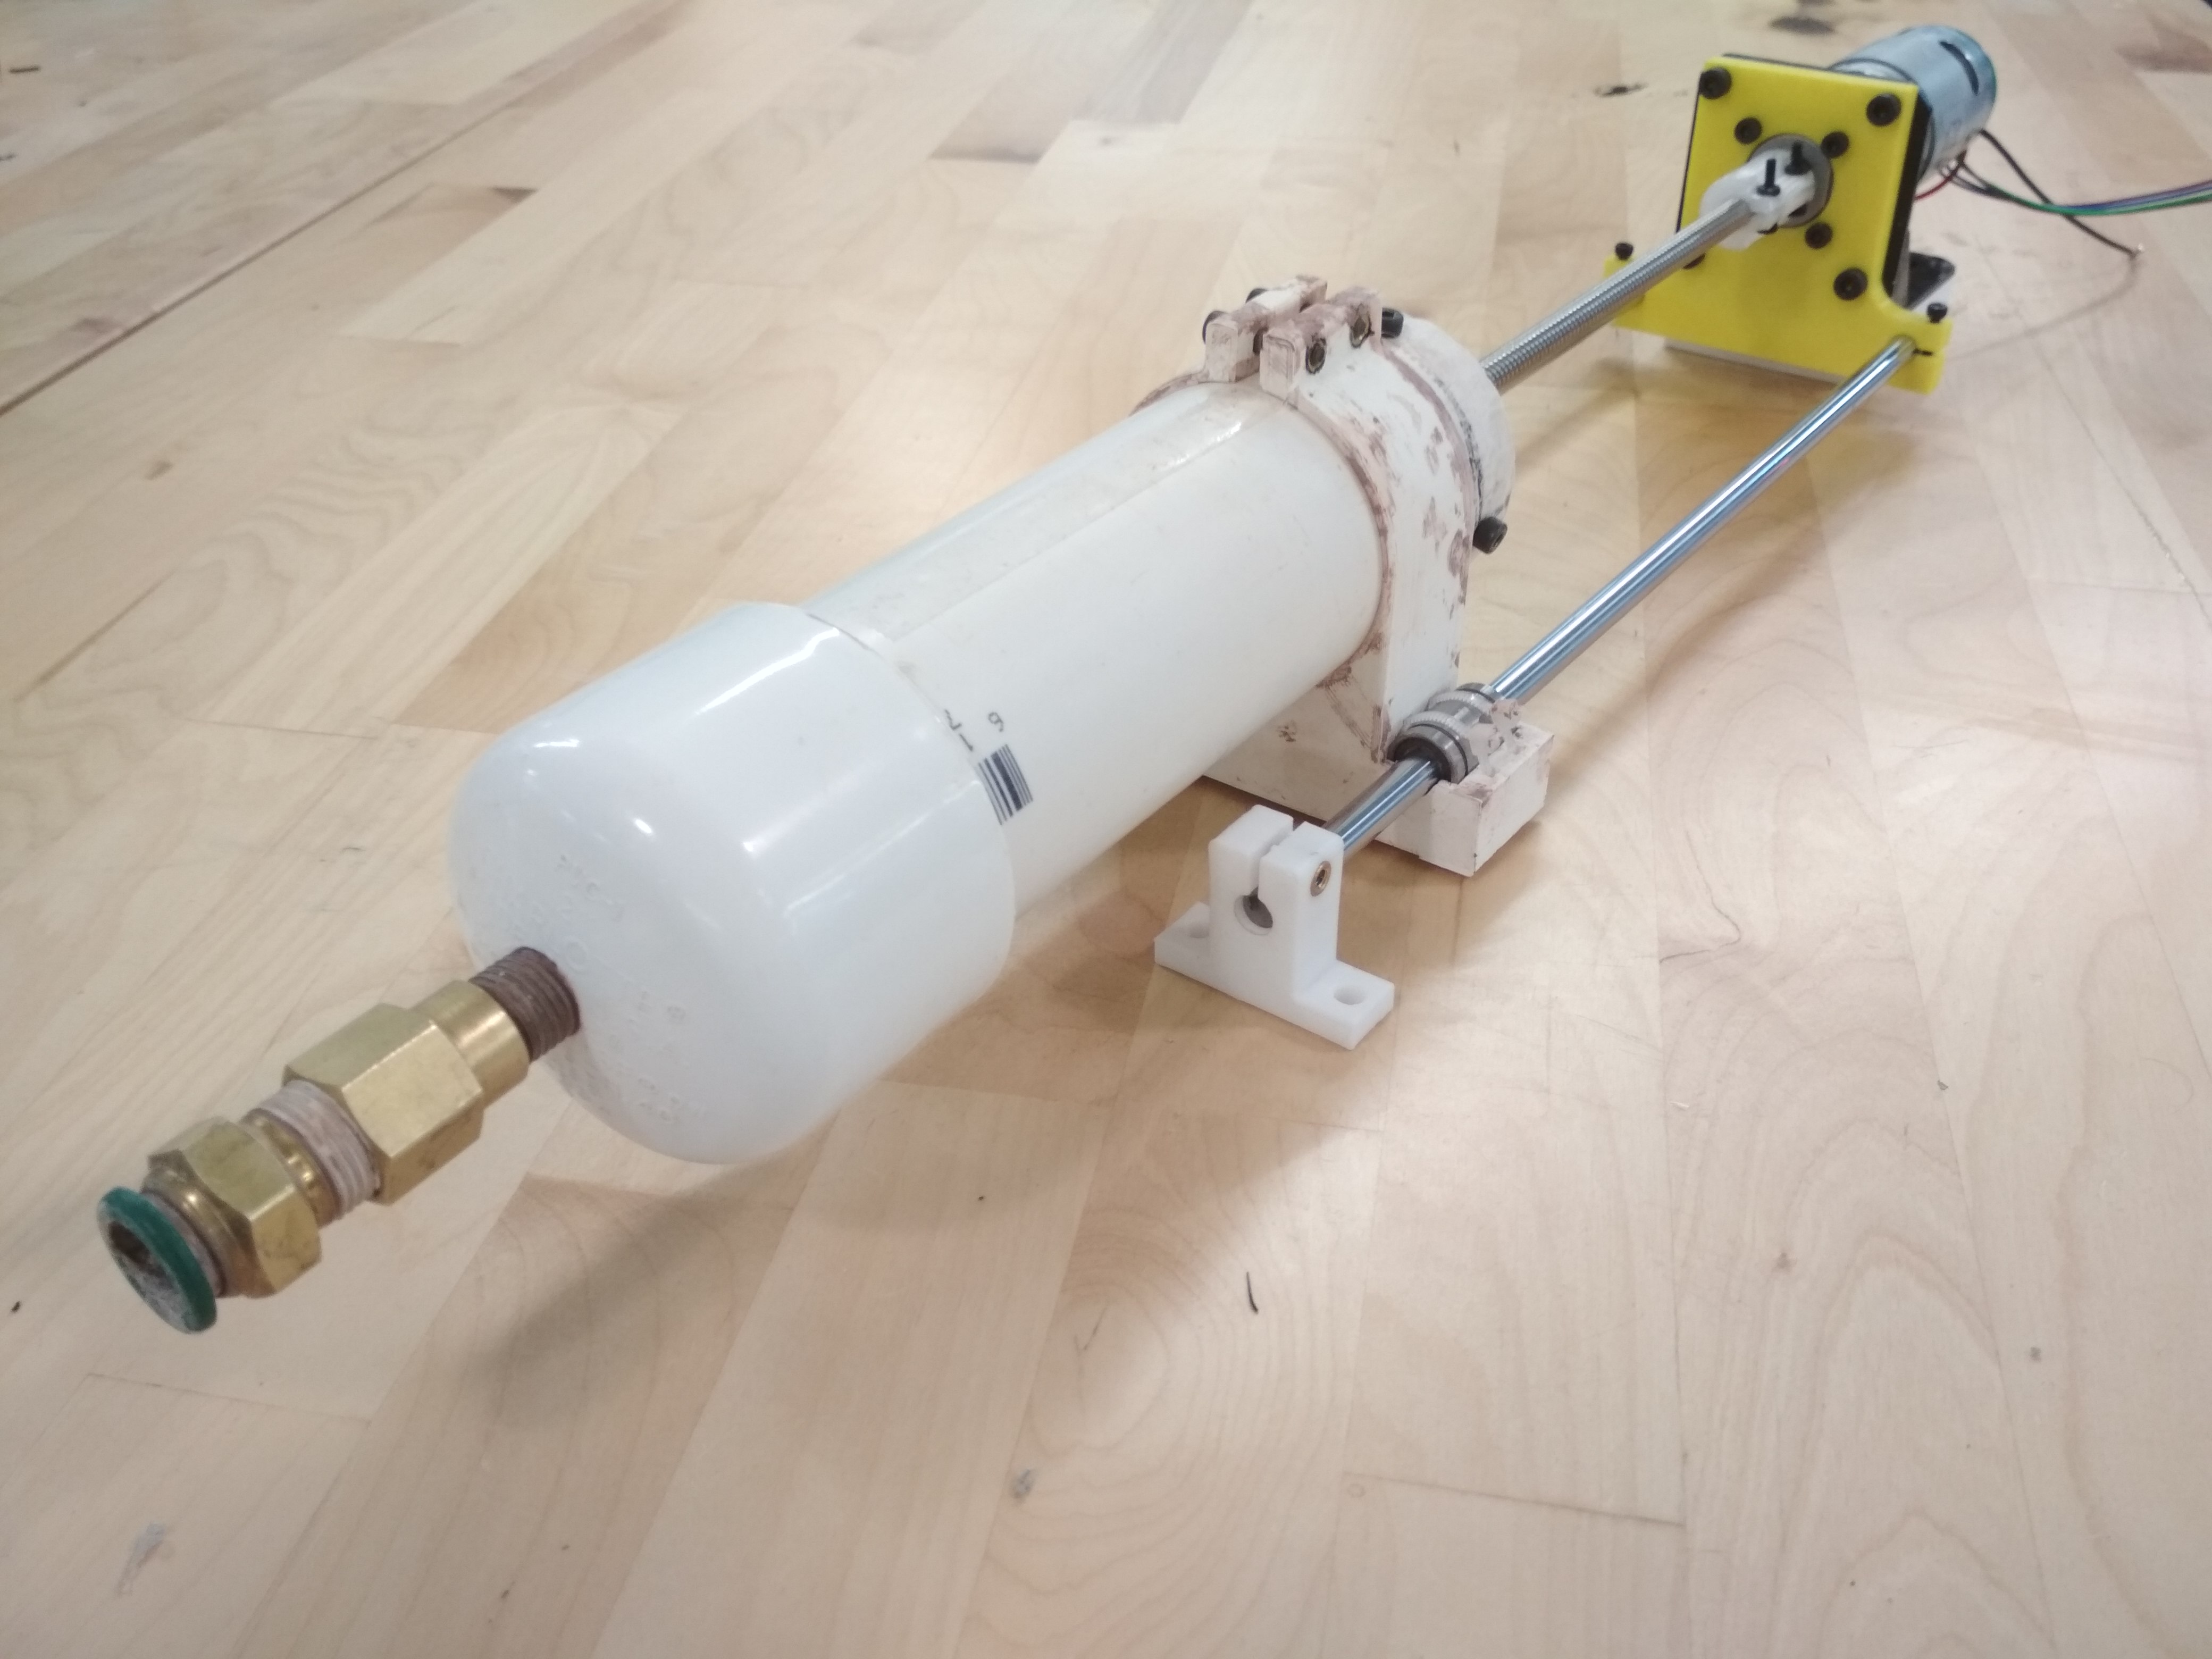
First Prototype
The first model uses a stepper motor to push the material to the extruder. I built this system and tested with a Celullose based Bio-Plastic.
Video:
First test:
José Tomás Domínguez (Joseto) on Vimeo.
Materials
| Qty | Description | Price | Link | Notes |
|---|---|---|---|---|
| 2 | LM8UU Linear Bearings | 1.00 $ | https://www.amazon.com/gp/product/B0711SNV4N?pf_rd_p=1581d9f4-062f-453c-b69e-0f3e00ba2652&pf_rd_r=R9JVPX22R85X7FW7D5QV | Order many, as those packages are more convinient than the unit price. |
| 2 | Chrome Linear Guides | 6.00 $ | https://www.amazon.com/dp/B07H9HDNYP/?coliid=I3FH7XXY9FZOZL&colid=IKZOWO2NXR68&psc=0&ref_=lv_ov_lig_dp_it | |
| 1 | Nema 23 Steel Mounting Support | 6.59 $ | https://www.amazon.com/Stepper-Bracket-Support-Mounting-Engraving/dp/B075L92Y6B/ref=sr_1_1?keywords=nema+23+base&qid=1553722704&s=gateway&sr=8-1 | |
| 1 | Nema 23 Lead Screw | 112.49 $ | https://www.amazon.com/STEPPERONLINE-Precision-Actuator-External-1-5875mm/dp/B07PTZ8JN4/ref=sr_1_5?crid=2S7PKB6A38INJ&keywords=nema+23+lead+screw&qid=1553722758&s=gateway&sprefix=nema23+lead%2Caps%2C135&sr=8-5 | |
| 1 | Ball Bearing | 6.97 $ | https://www.amazon.com/ABI-Enduro-cartridge-bearing-9-5x22-2x7/dp/B001GSKOB0/ref=sr_1_18?keywords=ball+bearing+9.5mm&qid=1553723200&s=gateway&sr=8-18 | This one is expensive, but you just need it to fit your lead screw from the motor. |
| 2 | O’Ring | 1.52 $ | https://www.amazon.com/uxcell-Rings-Nitrile-Rubber-Diameter/dp/B07HRRTRP9/ref=sr_1_13?keywords=o+ring+50mm&qid=1553723371&s=gateway&sr=8-13 | I used a 50mm diam with a 3mm thickness |
| 1 | Thread Seal | 1.2 $ | https://www.amazon.com/Everflow-811-5-Thread-Plumbers-White/dp/B00538ITFW/ref=sr_1_2?keywords=teflon&qid=1553723450&s=gateway&sr=8-2 | |
| 1 | PVC Tube | - $ | You can find it easily in a Home Depot store. I used an 52mm inner diam and 61 mm outer diam. |
I also used a kit of heated thread, but they can be replaced by simple nuts.
Conclusions
After working with this system, I decided to change the Stepper Motor for a DC Motor, this for the following reasons:
-
The cost of the Lead Screw Stepper Motor.
-
I didn’t need to control the position of the material. I needed to control the material flow, wich I could contrl through the voltage input of the motor.
-
I could build a board that cotrols the DC Motor and the Air Pumps.
Second Prototype
| Qty | Description | Price | Link | Notes |
|---|---|---|---|---|
| 2 | LM8UU Linear Bearings | 1.00 $ | https://www.amazon.com/gp/product/B0711SNV4N?pf_rd_p=1581d9f4-062f-453c-b69e-0f3e00ba2652&pf_rd_r=R9JVPX22R85X7FW7D5QV | Order many, as those packages are more convinient than the unit price. |
| 2 | Chrome Linear Guides | 6.00 $ | https://www.amazon.com/dp/B07H9HDNYP/?coliid=I3FH7XXY9FZOZL&colid=IKZOWO2NXR68&psc=0&ref_=lv_ov_lig_dp_it | |
| 1 | Nema 23 Steel Mounting Support | 6.59 $ | https://www.amazon.com/Stepper-Bracket-Support-Mounting-Engraving/dp/B075L92Y6B/ref=sr_1_1?keywords=nema+23+base&qid=1553722704&s=gateway&sr=8-1 | |
| 1 | Nema 23 Lead Screw | 112.49 $ | https://www.amazon.com/STEPPERONLINE-Precision-Actuator-External-1-5875mm/dp/B07PTZ8JN4/ref=sr_1_5?crid=2S7PKB6A38INJ&keywords=nema+23+lead+screw&qid=1553722758&s=gateway&sprefix=nema23+lead%2Caps%2C135&sr=8-5 | |
| 1 | Ball Bearing | 6.97 $ | https://www.amazon.com/ABI-Enduro-cartridge-bearing-9-5x22-2x7/dp/B001GSKOB0/ref=sr_1_18?keywords=ball+bearing+9.5mm&qid=1553723200&s=gateway&sr=8-18 | This one is expensive, but you just need it to fit your lead screw from the motor. |
| 2 | O’Ring | 1.52 $ | https://www.amazon.com/uxcell-Rings-Nitrile-Rubber-Diameter/dp/B07HRRTRP9/ref=sr_1_13?keywords=o+ring+50mm&qid=1553723371&s=gateway&sr=8-13 | I used a 50mm diam with a 3mm thickness |
| 1 | Thread Seal | 1.2 $ | https://www.amazon.com/Everflow-811-5-Thread-Plumbers-White/dp/B00538ITFW/ref=sr_1_2?keywords=teflon&qid=1553723450&s=gateway&sr=8-2 | |
| 1 | PVC Tube | - $ | You can find it easily in a Home Depot store. I used an 52mm inner diam and 61 mm outer diam. |
Air Flush
The second tank is based in the air pressure that air pumps gives to the material inside a syringe, this pushes the material to the extruder.
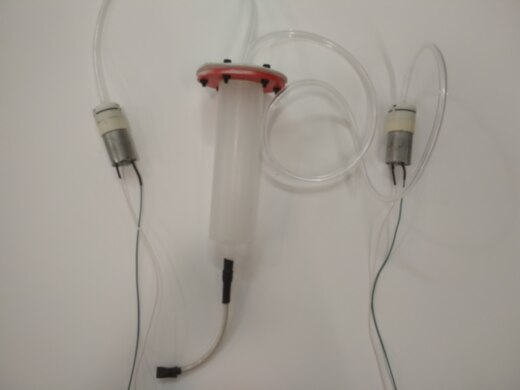
This system worked, but it was hard to build, and was full of air leaks. So I decided to build a second version that was insrted into the syringe. This version had to be easier to assemble, because I was constantly changing the material.
Thats how I got to this:
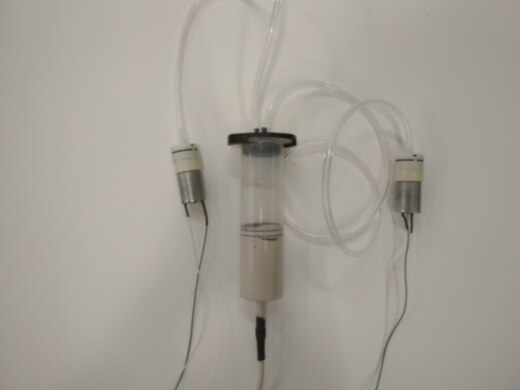
Video working
| Qty | Description | Price | Link | Notes |
|---|---|---|---|---|
| 3 | Air Pump | 1.00 $ | https://www.sciplus.com/12vdc-mini-diaphragm-air-pump-49508-p?gclid=CjwKEAjw__fnBRCNpvH8iqy4xl4SJAC4XERPaqF-4oHQjtn_5FDTjNwbEZzrjk_2aUz3QWGhV-flxBoCdG_w_wcB | Order many, as those packages are more convinient than the unit price. |
| 1 | Syringe 150 mL | 2.66 $ | https://www.amazon.com/Scientific-Nutrient-Measuring-Watering-Refilling/dp/B07PYVBYH3/ref=sr_1_5?keywords=syringe&qid=1560217299&s=gateway&sr=8-5 |
Extruder
Concept Validation
The first version I build was a replication of a thingiverse model Bricoleur Extruder, and tested using clat. This allowed me to validate the system, and redesigned in order to get better results:

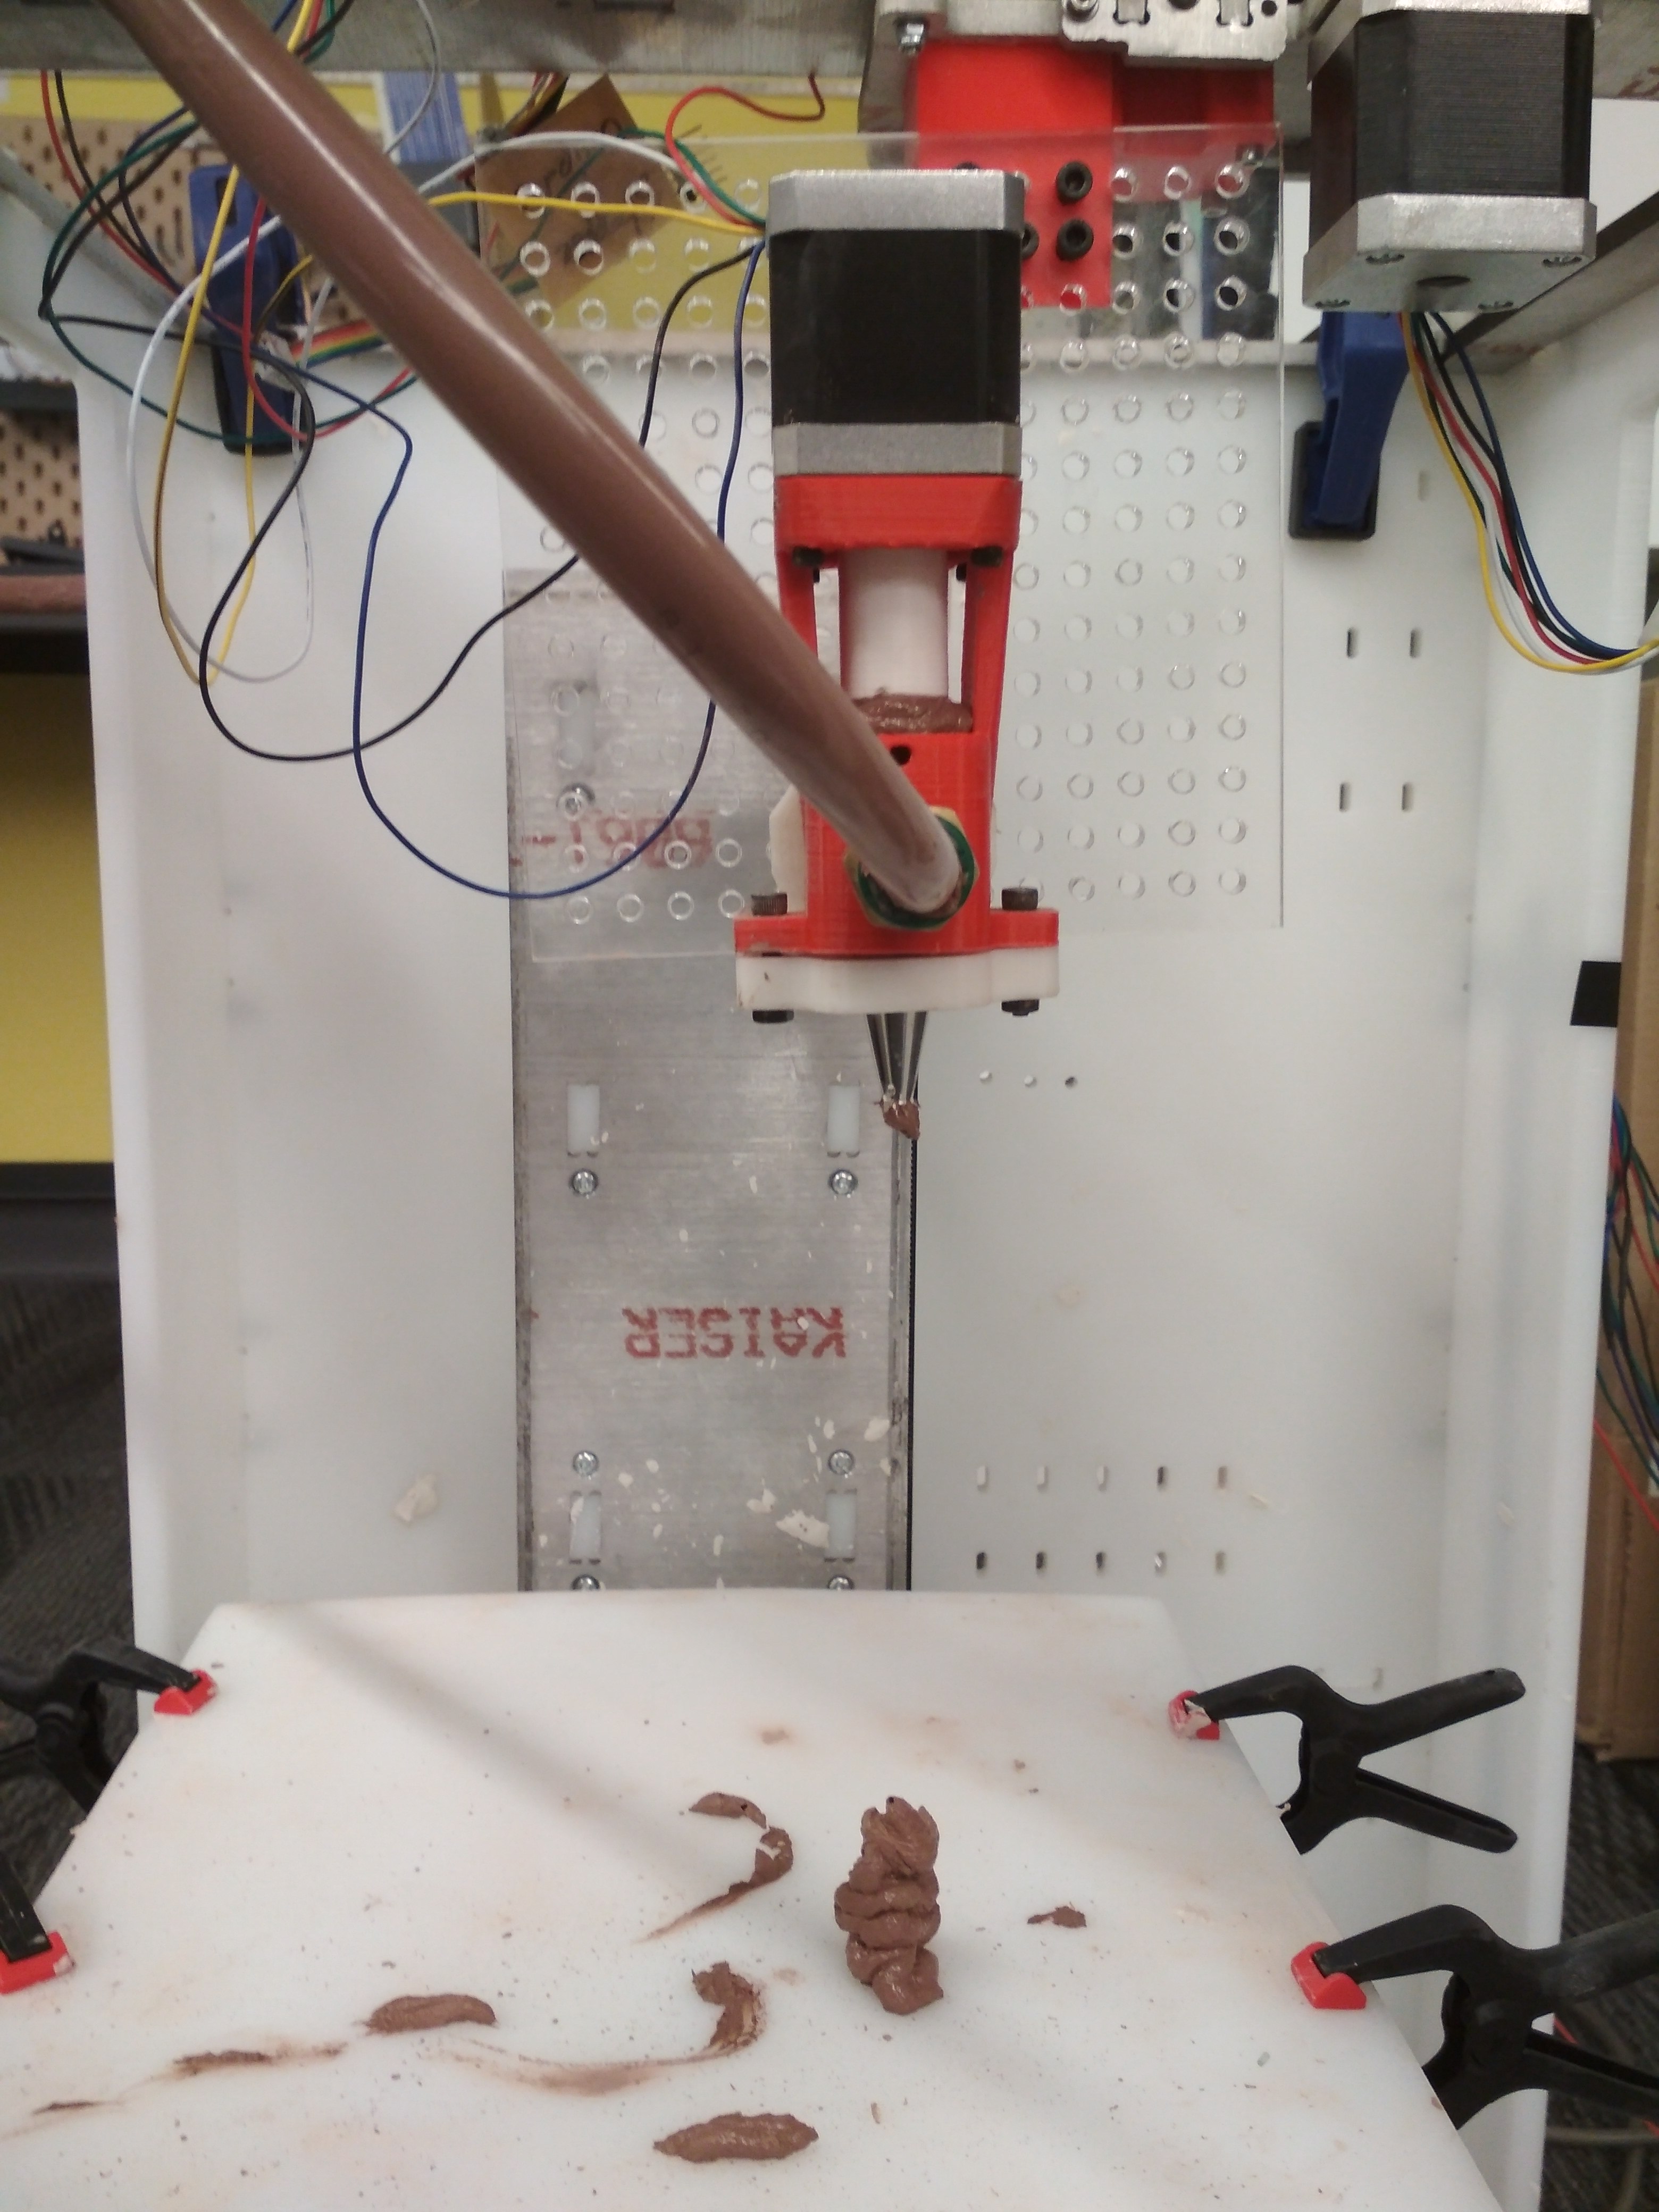
In the video I’m using the thingiverse extruder concept with the Hero 6 tank.
José Tomás Domínguez (Joseto) on Vimeo.
From this experience I got the following conclusions, and key modifications that must be done in my new version:
-
Easy to clean model, after every use, the model must been cleaned and this geometry wasn’t easy to clean.
-
3D Model the Auger Screw, instead of using a standard screw, this is one of the key part of the system because it defines the material flow and the pressure in the nozzle. I built a Parametric version of it that will be shown in the 3D Model section.
-
3D Model the nozzle, build a parametric version that could be easily modified.
Final Version
Video working
| Qty | Description | Price | Link | Notes |
|---|---|---|---|---|
| 1 | Stepper Motor Nema 17 | 12.99 $ | https://www.amazon.com/Stepper-Motor-Bipolar-64oz-Printer/dp/B00PNEQI7W/ref=sr_1_6?keywords=nema+17&qid=1560217362&s=gateway&sr=8-6 | |
| 1 | Push to connect Pipe Thread Adapter | 12.24 $ | https://www.homedepot.com/p/Tectite-1-in-Brass-Push-to-Connect-x-Male-Pipe-Thread-Adapter-FSBMA1/301410257 | Just if you are usign the Hero 6 system |